Some amusing things people search for and end up at my blog
So I was checking out my blog tracker, and mostly I get visitors searching for info about fusing plastic bags, and this past month a lot of people looking for cookie recipes. Every now and then I see a funny search query that led people here:
can you eat silver balls?
Mystery goo recipe
"you crossed the wrong fish"
great fury vengeance keeper
ROFL!
Sorry, I can't tell you the recipe for mystery goo, if I told you then it wouldn't be a mystery anymore!
But I can tell you that soylent green is people!!!!
Monday, December 31, 2007
2007 best and worst list!
Well there's about 9 more hours of 2007 left so it's customary to make a best and worst list, here's mine pretty quickly thrown together.
Now this blog usually just covers such a tiny part of my life, that it might be easy for people who don't know me to think the events covered in this blog were the most important things in my life. That would be totally incorrect. In reality and in the big picture, this craft stuff is just a small facet of my life. I keep my private life pretty private in public areas like blogs and Etsy forums.
Best time of 2007-
Spending a month in Europe this summer, staying with 6 different friends and their families (friends I originally met online, and became real-life friends with). Seeing Paris for the first time with my bf, spending my birthday in The Netherlands with him.
This whole concept of "online community" is not something new. It's something I have lived, something I have worked in, and it's a reality to me. I have been a part of online communities that really do care about eachother, where people meet up and travel together and form real-life relationships that support eachother through illness, death, and celebrate weddings and births of babies. Plus, it's great to make friends that live in European capitals so you can crash on their couches! Haha. (now seeking friends in Berlin and Prague)
Other highlights of the year are:
* Going to my friend's wedding, a friend who survived an aggressive brain tumor that gave him less than 50% survival odds. I don't have many heroes but he's someone who is really inspirational to me (and equally his wife who stood by his side during the whole treatment). It was really the most beautiful and emotional wedding I've ever seen. They couple just skipped the vows about "in sickness and in health" because they have already faced pretty much anyone's worst case scenario and they came through it strong, united, optimistic.
He has such a fantastic sense of humor, whenever I feel sorry for myself about any of the STUPID trivial bullshit that would be on my "worst" list, I have to think about how lucky I am.
I am healthy.
I have a roof over my head.
I love and am loved.
Anything else is meaningless.
The worst of 2007
In the big picture, the war and especially the growing evidence of torture by the U.S. is probably the greatest tragedy of 2007. Every time I hear them debate about waterboarding on the news with these dry and analytical attitudes, it makes me physically ill. How can any sane person even consider, for a moment, that this could be acceptable way for civilized societies to operate? Is this the Spanish Inquisition? Did the Enlightenment never happen? I'm ashamed to be human, much less ashamed to be American.
All in all I really didn't have that many bad things in my own little life. I had some friends who had cancer scares, but all of them have recently had good test results and are going to be OK.
I had some trivial problems, but if that was the worst thing that happened to me all year I'd have to be pretty happy with my year, because it was really an insignificant blip on the radar.
Best live show of 2007:
This is a tough one because I saw some great music this year. The amazing return of Iggy and the Stooges, an absolutely transcendent solo performance by Lisa Gerrard from Dead Can Dance. But the best show was probably the Black Rebel Motorcycle Club show I saw in Amsterdam in July. I've seen many good shows from them but the Amsterdam show just set the bar even higher.
Best Movie of 2007
oh this is tough because I really haven't seen hardly any movies this year! I used to see tons of movies, at least 2 a week, and lately I haven't gone to any for ages. I have been watching dvds, but they are older than 2007.
I have most of the movies from the critics "best of 2007" lists on my netflix queue so I probably won't know the best movie until 2008. :p
Of the movies I did see, I liked Grindhouse (the Rodriguez half, not Tarantino's film), Stardust, and Black Snake Moan.
Tarantino's "Death Proof" , half of the Grindhouse double feature, might well be the worst movie I saw this year. Well, the worst movie I paid for. I did see some stinkers on airplanes (like "Failure to Launch"- UGH!!) but I don't really count them because I didn't choose to see them.
Well, it's nearly 2008 so I wish everyone a Happy New Year.
*flings silver confetti*
Let's hope the next year brings happiness and success to those who deserve it, justice and truth to those who deny it, a Democratic president to this country, and an end to the horrible war. I wish Peace, love, puppies and cupcakes(with sprinkles!) to all my friends, and I wish bad hair days, traffic jams and papercuts to those who have fucked with me. Ouchy! LOL you crossed THE WRONG FISH!
Monday, December 17, 2007
Great Speeches of Vengeance
I was just thinking today about some of the great and moving speeches of vengeance from history, movies, theater, and television. I thought I'd share some of my special favorites. I love language, it has such power to strike terror in the hearts of the weak.
Klaus the goldfish from American Dad
Jules (played by Samuel Jackson), Pulp Fiction
Act 5, Titus Andronicus
Oh yeah, he's bad. But you know the villains are always the best characters, and they get all the best lines!
Allow me to impress upon you the severe mistake you have made.
For years my conduct has been largely benign, and yet without provocation you have severed our détente and forced me to unleash upon you the vengeful flames of a thousand suns.
You shall curse your mothers for the day of your birth!
So go now, GO, and begin your life of fear,
knowing that when you least expect it, the looming sword of Damocles will CRASH down upon you, cleaving you in twain,
and as you gaze upon the smoking wreckage that was once your life, you will regret the day you crossed THE WRONG FISH!
Klaus the goldfish from American Dad
The path of the righteous man is beset on all sides by the iniquities of the selfish and the tyranny of evil men. Blessed is he, who in the name of charity and good will, shepherds the weak through the valley of darkness, for he is truly his brother's keeper and the finder of lost children. And I will strike down upon thee with great vengeance and furious anger those who would attempt to poison and destroy my brothers. And you will know my name is the Lord when I lay my vengeance upon thee.
Jules (played by Samuel Jackson), Pulp Fiction
LUCIUS
Art thou not sorry for these heinous deeds?
AARON
Ay, that I had not done a thousand more.
Even now I curse the day--and yet, I think,
Few come within the compass of my curse,--
Wherein I did not some notorious ill,
As kill a man, or else devise his death,
Ravish a maid, or plot the way to do it,
Accuse some innocent and forswear myself,
Set deadly enmity between two friends,
Make poor men's cattle break their necks;
Set fire on barns and hay-stacks in the night,
And bid the owners quench them with their tears.
Oft have I digg'd up dead men from their graves,
And set them upright at their dear friends' doors,
Even when their sorrows almost were forgot;
And on their skins, as on the bark of trees,
Have with my knife carved in Roman letters,
'Let not your sorrow die, though I am dead.'
Tut, I have done a thousand dreadful things
As willingly as one would kill a fly,
And nothing grieves me heartily indeed
But that I cannot do ten thousand more.
Act 5, Titus Andronicus
AARON
O, why should wrath be mute, and fury dumb?
I am no baby, I, that with base prayers
I should repent the evils I have done:
Ten thousand worse than ever yet I did
Would I perform, if I might have my will;
If one good deed in all my life I did,
I do repent it from my very soul.
Oh yeah, he's bad. But you know the villains are always the best characters, and they get all the best lines!
Saturday, December 15, 2007
Holiday baking journal, part 2
The first baking journal was getting pretty LONG with 6 recipes, so I thought I'd start a new one.
I made these on Wednesday but didn't get around to blogging it until today.

CHOCOLATE RUGELACH!!!
This is the first time I have made these, but it won't be the last. Oh lordy are they good!
Ingredients :
8 ounces cream cheese, room temp and cut into chunks
2 sticks (1 cup) butter, room temp and cut into chunks
2 teaspoons sugar
2 cups all-purpose flour
filling:
1 can Love'n Bake™ Chocolate "Schmear" Filling
Cream the butter and cream cheese and sugar.
sift in the flour and mix until dough can form a ball
pat the dough into a flattened round, wrap in plastic wrap and chill for 30 minutes.
preheat oven to 375 (F), and grease 2 cookie sheets
divide dough in half and roll out half of it on a floured surface into a circle about 11 inches in diameter.
place a large dinner plate on dough and trim around edges with a knife.
spread the chocolate "Schmear" Filling on the circle.
Cut the circle into quarters, and then cut each quarter into 4 pieces, to form 16 wedge shaped pieces.
Roll up a triangle starting from the wide end, and tuck the point under the cookie on the baking sheet.
Repeat with other half of dough.
Take the scrap dough (from cutting the circles) and reroll it to another circle shape, to make a third set of 16 cookies (which will usually be smaller and less perfect than the first two sets. That's OK- these are your testers that you eat yourself, and save the pretty ones for company!).
Don't reroll the dough more than once or too much gluten will form.
mix 1 egg white with 1 teaspoon cold water.
brush cookies with egg white glaze and sprinkle with sugar.
bake until golden, 15-20 minutes.
cool on a wire rack.
Note: you can also make almond or cinnamon rugelach with the same dough, just substitute the filling.
----------------------------------------------
Update December 16, 2007
This weekend I made Homemade chocolate graham crackers, topped with peppermint bark.

*drooool*
These are frekakin GOOD, the crispness of the thin chocolatey cracker sets off the creamy decadence of the peppermint bark just perfectly. You could make these with storebought graham crackers too, but I find those thicker and chewier than my homemade ones, andjust not as tasty.
INGREDIENTS
1/2 cup All-Purpose Flour
3/4 cup Whole Wheat Flour
1/2 teaspoon salt
1/2 cup Dutch-process cocoa
1 1/4 cups powdered sugar
1 teaspoon baking powder
1/2 cup (1 stick) unsalted butter
2 tablespoons honey
2 tablespoons cold milk
Preheat your oven to 325°F. Cut out two sheets of parchment paper as large as your cookie sheets.
In a medium-sized bowl, whisk together the flours, salt, cocoa, sugar, and baking powder. With a pastry blender, cut the butter into the flour mixture until evenly crumbly.
In a separate bowl, combine the honey and milk, stirring until the honey dissolves. Add the liquid to the dry ingredients and toss lightly with a fork until the dough comes together. Add a few drops additional milk, if necessary.
Turn the dough out onto a well-floured surface and fold it over gently 5-6 times, until smooth. Divide the dough in half. Work with half the dough at a time, keeping the remaining dough covered.
Transfer one piece of dough to a piece of parchment. Roll it into a rectangle a bit larger than 10 x 14 inches; the dough will be about 1/16-inch thick. Trim the edges and prick the dough evenly over the entire surface with a dough docker or fork. Repeat with the remaining dough and parchment. Place the rolled-out dough pieces, on their parchment, onto baking sheets.
Bake the crackers for 15 minutes, or until you begin to smell chocolate. Remove them from the oven, and immediately cut them into rectangles with a pizza wheel or knife.
I use a fluted pastry wheel, it's like pinking shears for cookies!
Transfer them to a rack to cool.
PEPPERMINT BARK INGREDIENTS
1 12-ounce bag of white chocolate chips
2 regular size candy canes, or 10-15 starlight peppermint candies
unwrap the candy canes or starlight mints, and put them in a ziplock baggie.
Smash them up with a hammer or meat tenderizer.
Melt the white chocolate chips in a double boiler, or in a microwave. If you use the microwave, only nuke it for short periods (30-45 seconds) at low power, stirring in between each nuking.
Stir the crushed candy canes into the melted white chocolate.
Spread the delicious goo onto the chocolate graham crackers.
You can leave it to harden at room temperature, but it takes longer.
You can put them in the fridge to harden quicker, but you need to transfer them to smaller platters that will fit in your fridge.
If you live in a cold climate and it's not raining, a great way to harden them is just put them outside for a few seconds! Voila, walk-in freezer!
I made these on Wednesday but didn't get around to blogging it until today.
CHOCOLATE RUGELACH!!!
This is the first time I have made these, but it won't be the last. Oh lordy are they good!
Ingredients :
8 ounces cream cheese, room temp and cut into chunks
2 sticks (1 cup) butter, room temp and cut into chunks
2 teaspoons sugar
2 cups all-purpose flour
filling:
1 can Love'n Bake™ Chocolate "Schmear" Filling
Cream the butter and cream cheese and sugar.
sift in the flour and mix until dough can form a ball
pat the dough into a flattened round, wrap in plastic wrap and chill for 30 minutes.
preheat oven to 375 (F), and grease 2 cookie sheets
divide dough in half and roll out half of it on a floured surface into a circle about 11 inches in diameter.
place a large dinner plate on dough and trim around edges with a knife.
spread the chocolate "Schmear" Filling on the circle.
Cut the circle into quarters, and then cut each quarter into 4 pieces, to form 16 wedge shaped pieces.
Roll up a triangle starting from the wide end, and tuck the point under the cookie on the baking sheet.
Repeat with other half of dough.
Take the scrap dough (from cutting the circles) and reroll it to another circle shape, to make a third set of 16 cookies (which will usually be smaller and less perfect than the first two sets. That's OK- these are your testers that you eat yourself, and save the pretty ones for company!).
Don't reroll the dough more than once or too much gluten will form.
mix 1 egg white with 1 teaspoon cold water.
brush cookies with egg white glaze and sprinkle with sugar.
bake until golden, 15-20 minutes.
cool on a wire rack.
Note: you can also make almond or cinnamon rugelach with the same dough, just substitute the filling.
----------------------------------------------
Update December 16, 2007
This weekend I made Homemade chocolate graham crackers, topped with peppermint bark.
*drooool*
These are frekakin GOOD, the crispness of the thin chocolatey cracker sets off the creamy decadence of the peppermint bark just perfectly. You could make these with storebought graham crackers too, but I find those thicker and chewier than my homemade ones, andjust not as tasty.
INGREDIENTS
1/2 cup All-Purpose Flour
3/4 cup Whole Wheat Flour
1/2 teaspoon salt
1/2 cup Dutch-process cocoa
1 1/4 cups powdered sugar
1 teaspoon baking powder
1/2 cup (1 stick) unsalted butter
2 tablespoons honey
2 tablespoons cold milk
Preheat your oven to 325°F. Cut out two sheets of parchment paper as large as your cookie sheets.
In a medium-sized bowl, whisk together the flours, salt, cocoa, sugar, and baking powder. With a pastry blender, cut the butter into the flour mixture until evenly crumbly.
In a separate bowl, combine the honey and milk, stirring until the honey dissolves. Add the liquid to the dry ingredients and toss lightly with a fork until the dough comes together. Add a few drops additional milk, if necessary.
Turn the dough out onto a well-floured surface and fold it over gently 5-6 times, until smooth. Divide the dough in half. Work with half the dough at a time, keeping the remaining dough covered.
Transfer one piece of dough to a piece of parchment. Roll it into a rectangle a bit larger than 10 x 14 inches; the dough will be about 1/16-inch thick. Trim the edges and prick the dough evenly over the entire surface with a dough docker or fork. Repeat with the remaining dough and parchment. Place the rolled-out dough pieces, on their parchment, onto baking sheets.
Bake the crackers for 15 minutes, or until you begin to smell chocolate. Remove them from the oven, and immediately cut them into rectangles with a pizza wheel or knife.
I use a fluted pastry wheel, it's like pinking shears for cookies!
Transfer them to a rack to cool.
PEPPERMINT BARK INGREDIENTS
1 12-ounce bag of white chocolate chips
2 regular size candy canes, or 10-15 starlight peppermint candies
unwrap the candy canes or starlight mints, and put them in a ziplock baggie.
Smash them up with a hammer or meat tenderizer.
Melt the white chocolate chips in a double boiler, or in a microwave. If you use the microwave, only nuke it for short periods (30-45 seconds) at low power, stirring in between each nuking.
Stir the crushed candy canes into the melted white chocolate.
Spread the delicious goo onto the chocolate graham crackers.
You can leave it to harden at room temperature, but it takes longer.
You can put them in the fridge to harden quicker, but you need to transfer them to smaller platters that will fit in your fridge.
If you live in a cold climate and it's not raining, a great way to harden them is just put them outside for a few seconds! Voila, walk-in freezer!
Thursday, December 6, 2007
Happy Birthday Cute Knut!
I am a day late but I still wanted to wish a happy birthday to Cute Knut the polar bear.

Knut is my avatar and I just fell in love with the little guy last Christmas, as the little orphaned bear cub from the Berlin zoo.

He's not so little and not so cute anymore, (he weighs 245 lbs and he's still growing!) but he is enjoying being one year old!
To celebrate Knut's birthday I made Polar Bear cookies yesterday!

Rrrowwwr, eat them before they eat you!
I have also made a series of polar bear Christmas stockings for my Etsy shop
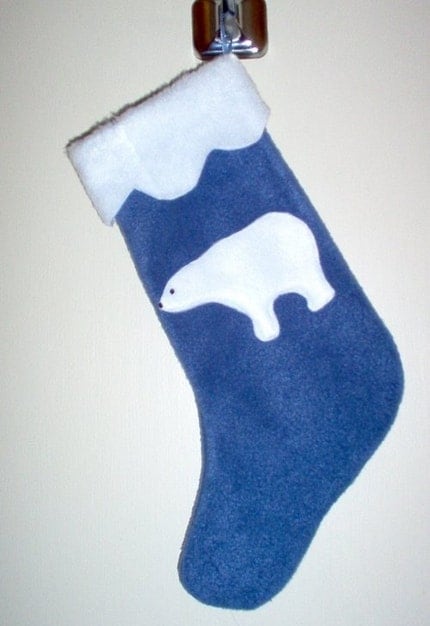
I've sold five of them so far, and for every one sold, I'm donating half the price to the World Wildlife Fund to help save polar bears in the wild. (and other endangered animals)
and last but not least, I had to buy this
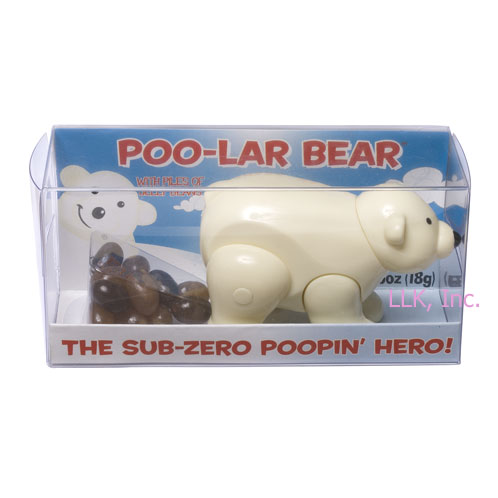
the amazing pooping Poo-Lar Bear!! LOL can anything top that?
watch him in action!
(not my video)
Knut is my avatar and I just fell in love with the little guy last Christmas, as the little orphaned bear cub from the Berlin zoo.
He's not so little and not so cute anymore, (he weighs 245 lbs and he's still growing!) but he is enjoying being one year old!
To celebrate Knut's birthday I made Polar Bear cookies yesterday!
Rrrowwwr, eat them before they eat you!
I have also made a series of polar bear Christmas stockings for my Etsy shop
I've sold five of them so far, and for every one sold, I'm donating half the price to the World Wildlife Fund to help save polar bears in the wild. (and other endangered animals)
and last but not least, I had to buy this
the amazing pooping Poo-Lar Bear!! LOL can anything top that?
watch him in action!
(not my video)
Saturday, December 1, 2007
Holiday Baking Journal
The cookie factory is back in business!
Every year for the past 15 years or so, I have made an assortment of cookies and goodies for the Holidays. Some years I have gone just crazy and made like 15 different kinds, spread out over the month. Whenever I make a batch of cookies I freeze half of it, so that on Christmas eve I can take out the frozen cookies and have a beautiful assorted platter to serve guests. You can also make lovely gift bags this way with one or two of each kind per person.
I like to choose an assortment of recipes each year that will make a pleasing diverse platter. For example, as much as I love chocolate, it's kind of boring to have 10 kinds of chocolate cookies on a plate. I like to make sure there are different colors, different shapes and different flavors in my assortment.
I keep lists of everything I have made each year, but this year I'm going to keep the list in blog form. I'll try to include photos and recipes for each batch.
I will be adding to this blog article with edits or comments when I have a new entry, rather than adding a new article for each thing. So keep checking back to this article every few days for the latest goodie!
I kicked off my holiday baking today with two old favorites:
Bright-Eyed Susans

and Glazed Pecans

For all of my recipes, unless otherwise specified:
flour means all-purpose white flour. I will specify cake flour or whole wheat flour if you need it.
sugar means granulated white sugar. I will specify brown or powdered sugar if you need it.
butter means real sweet cream unsalted butter, do not substitute margarine or butter-favored crisco! I will specify shortening if you need it. I NEVER use margarine for baking because it has too high of water content and the texture will be soggy instead of crisp.
egg means whole egg. I will specify white or yolk if you need to separate the egg.
Yes, some of these things are not the healthiest foods for you. But in my opinion when it comes to baking you have to use the real stuff. No fake fat, fake sugar, chemical polymers or mystery goo.
---------------------------------
Bright-Eyed Susans
I forget where I originally got this recipe but I think it was a Southern cookbook.
INGREDIENTS:
* 3/4 cup butter, softened
* 1/2 cup sugar
* 1 egg
* 1 teaspoon vanilla
* 1/4 teaspoon salt
* 1 3/4 cups flour
* about 24 chocolate non-pareils
Cream together butter and sugar until well mixed.
Add egg, vanilla and salt until blended.
Sift in the flour and mix until blended.
Wrap dough in plastic wrap and chill for 1 hour in refrigerator. (not freezer)
Shape cookie dough into 1-inch balls; place about 2 inches apart onto an ungreased baking sheet.*
Place a chocolate non-pareil on each cookie, flattening the cookie.
Bake at 400°(F) for 8 to 10 minutes. Bake until set but not brown.
Makes about 2 dozen cookies
*Tip: I always use parchament paper for baking cookies, whether the recipe calls for greased or ungreased cookie sheet. You never have to grease the pan when you use parchament paper and you don't have to wash it either!
option: you can use Chocolate Stars or even Hershey Kisses if you can't find non pareils.
---------------------------------
Glazed Nuts
I got this recipe about 7 or 8 years ago from a Victorian-themed Christmas magazine. I am not sure the recipe is historically accurate but candied nuts were very popular Christmas treats in Victorian times, and they are just as delicious now. You can use almost any kind of nuts, I like using pecans, almonds, or walnuts. This candy glaze is similar to peanut brittle, but the proportion is more nuts and less "brittle"
INGREDIENTS:
1 cup whole raw nuts
1/2 cup granulated sugar (*see note)
2 tablespoons butter
Combine nuts, sugar and butter in heavy skillet. I use a cast iron skillet. Do not use a teflon-coated pan. Some candy-makers believe that sugar melts better in a copper pot, but I've never cooked with copper pots!
Cook over medium heat, stirring constantly with wooden spoon, until nuts are toasted and sugar is golden brown and the consistency of a thick syrup. (about 15 minutes)Sugar should not be grainy.
If you want to test with a water glass, the syrup should be in the hard crack stage.
Remove from heat and stir in 1/2 teaspoon vanilla.
Spray a piece of aluminum foil with non-stick spray (like Pam).
Spread the nuts onto the foil in an even layer, and immediately sprinkle lightly with salt. (if you wait too long the salt won't stick)
BE CAREFUL AND USE OVEN MITTS, and wear long sleeves. This molten sugar syrup is HOT and sticky so if some gets on you it is like napalm. It will burn you and take some skin off with it when you peel it off.
Let the candy cool, then break into 2 or 3 nut clusters. This makes a great gift in pretty glass jam jars with their labels soaked off. I like to spray-paint the jar lids silver or gold so you can't see the jam logo.
* Use pure cane sugar only for this recipe. I used to think all sugar is the same and for most baked goods it is, but whenever I used cheaper store brand sugar for this recipe, it just wouldn't caramelize properly. I later read that most store brand sugar is beet sugar which doesn't caramelize as well as cane sugar. So you can use beet sugar for cookies and cakes but I recommend cane sugar for candy making.
Also I recommend not making these on a rainy or humid day. The weather can seem to interfere with caramelizing too. Crisp dry days are the best.
*If sugar crystalizes and won't get syrupy, add a few tablespoons of corn syrup or maple syrup to get it liquidized. DO NOT ADD WATER! (or any water-based liquid) It will vaporize instantly on hitting the hot syrup and can give you nasty steam burns.
*option: you can use raw sunflower seed kernels for this recipe, that comes out really yummy! But if you use them, do not add them until you've cooked the sugar to the syrupy stage. They are so small they will burn if you cook them 15 minutes. Just cook the syrup alone and then add seeds when the syrup is 3-4 minutes from being done.
*option: Substitute other flavorings for vanilla. I have used cinnamon oil and a drop of red food coloring to make delicious cinnamon glazed almonds. It's like the coating on candy apples! Oils based flavorings work best, while alcohol based favorings like vanilla extract will sizzle a bit when you first stir them in. Stir fast before it all evaporates.
Ok, that's it for now but I'll make more goodies tomorrow!
---------------------------------
Update Dec 3, 2007
Today's cookie is Cuban Wedding Cakes

otherwise known as Mexican Wedding Cookies or Russian Tea Cakes.
I have tried a couple different recipes for these and this one is my favorite.
INGREDIENTS
2 cups flour
1 cup hazelnut meal *
1/2 cup powdered sugar
pinch of salt
1 teaspoon vanilla
1 cup butter, softened and cut into pieces
extra powdered sugar for coating
preheat oven to 325 (F)
Mix together the first 4 ingredients.
Stir in the vanilla.
With a pastry blender, cut in the butter.
Mix until dough looks line fine crumbs and holds together. All dry ingredients should be incorporated.
Knead dough with your hands a few times gently. Just squish it together to make sure all the dry stuff is mixed in.
Roll dough into 1-inch balls, and bake on ungreased cookie sheet at 325 (F) for 25 minutes. The lower temperature and slower baking time keeps the balls in their shape, so they don't spread out.
Cool 5 minutes, then roll cookies in powdered sugar. I use Snow White Non-melting Sugar because it won't dissolve or go invisible on a moist or oily cookie.
If you use regular powdered sugar and it does soak up the oil and melt, cool cookies completely and roll them in powdered sugar a second time.
* Nut meal is very finely chopped nuts. You may use hazelnut meal, almond meal, or pecan meal. You can also make your own by putting toasted unsalted nuts in a blender but be careful not to make nut butter.
---------------------------------
update Dec 6, 2007
Today's cookie of the day, which I actually baked yesterday but decorated today, is:
Christmas Spice Cookies
I made these in polar bear shapes in honor of Cute Knut's birthday, about which I will make a separate blog post. This recipe is so nostalgic for me. My mom used to bake these cookies every Christmas, and my sisters and I would decorate them. Now, my mom was not a June Cleaver cookie-baking mom! She has a PhD and worked full time her whole life. Christmas was the only time of year she baked cookies from scratch, and as my sisters and I got old enough, we took over the baking. But I have very fond memories of all of us sitting around the table with colored icings, colored sugars, jimmies, and those little silver balls that break your teeth if you eat them. I also still have the cookie cutters my mom used all those years ago, but I have increased the collection quite a bit.
Most people make simple sugar cookies to decorate, but I think this spice cookie recipe makes a much more interesting cookie.
INGREDIENTS
1/2 cup shortening, I use Crisco sticks because it's so easy to measure
1/2 cup sugar
1 egg
....
1 1/4 cup flour
1 1/2 teaspoons baking powder (not soda)
1/4 teaspoon salt
1/2 teaspoon ground cinnamon
1/4 teaspoon ground nutmeg
1/8 teaspoon ground cloves
Cream together shortening and sugar until well mixed and fluffy.
mix in egg.
sift together all the dry ingredients, then add to shortening mixture.
mix until all dry ingredients are incorporated and dough holds together
wrap dough in waxed paper and chill at least 30 minutes.
Flour a smooth surface and flour your rolling pin. I use a rolling pin cover which is like a thin knitted sock, and a rolling cloth which is like thick cotton canvas. They make rolling a little easier but you don't need them, you just may have to use a little more flour.
Divide the dough in half and roll out half at a time, until it's about 1/8 inch thick.
Cut out shapes with your favorite cookie cutters. I recommend polar bears!
Bake on a greased cookie sheet in a preheated 350 (F) oven for 10 minutes.
Cookies should be lightly brown at edges but not too dark.
cool completely before decorating.
To decorate:
I make a simple icing with powdered sugar and milk. I don't measure, just pour a cup or two of powdered sugar in a bowl and add milk a tiny bit at a time, stirring after each addition. Don't add too much milk to begin with! You can always add a few more drops to thin the icing but if you make it too runny, it takes a LOT of sugar to thicken it. You want it thin enough to spread but thick enough that it won't run off the sides of the cookie. You can divide he icing into smaller bowls now, and color them different colors with a drop or two of food coloring. I usually need a bowl of green for the tree cookies, a bowl of white for the snowflakes and polar bears, and some red for the stockings and ornaments.
Spread the icing on a few cookies at a time and then decorate with your choice of sprinkles, jimmies, colored sugars, edible glitter like I used on the bears, or fancy sugar decors.
But if you're in California like me, the days of little silver balls are over. apparently someone thinks those little silver balls will kill you. Go figure! I am still alive!
Check it out, I can't even buy them online.
The decors and sprinkles stick best when the icing is wet so just decorate a few cookies at a time. If you are really patient and fancy yourself the next Martha Stewart, you can use a cake decorating bag and really get fancy!
Have fun and if you have kids, let them help decorate the cookies. Make some sweet memories!
-------------------------
December 9 update!
Today's cookie is Peppermint Meltaways

I first made these cookies in 3rd grade, I think, with my dad. Our school was having some kind of bake sale and there was a cookie cookbook in the school library that I loved because of the gorgeous photos. I checked the book out and picked a cookie for us to make together. We made these mint meltaways, but in pale green instead of pink.
They were quite delicious and I remembered their melt-in-your-mouth quality. Then I returned the book to the library and that was that.
When I got older and started baking on my own, I looked for that cookbook in several libraries and could never find it. I remembered some of the photos so vividly from childhood but I didn't remember the name and I thought I'd never see them again. Then I was in a bookstore 2 years ago and I saw the cookbook! It was an updated version but I recognized it instantly. I almost bought it, but then had the idea to look for the original version used on Ebay, now that I knew the title. And HALLELUJAH, I found it! So now I try to bake something every year from this vintage 1973 cookbook and I still love looking at the photos I used to love so much as a child.
These mint meltaways are from page 113 of "The Betty Crocker Cooky Book".
INGREDIENTS
1 cup butter, softened
1/2 cup sifted powdered sugar
1 teaspoon peppermint extract
2 drops red food coloring
2 1/4 cups cake flour*
1/4 teaspoon salt
Preheat oven to 400F.
Cream butter, sugar, peppermint extract and food coloring thoroughly.
Measure flour and salt into a bowl, blend into butter mixture.
Drop by teaspoonfuls onto ungreased cookie sheet.
Bake for 8 minutes at 400 (F). Cookies should be set but not brown.
While warm, sift a light dusting of powdered sugar over cookies.
* cake flour is important to this recipe. Cake flour has less gluten than all-purpose flour so it makes a tender, melt-in-your-mouth cookie.
------------------------------
Update December 12, 2007
Today's goodie is Lemon Bread, it's a quickbread (non-yeasted), but it has a light, tender texture like a cake, thank to the cake flour and beaten egg whites.
I LUUUURVE me some lemons. I love lemon anything- cookies, cake, candy, drinks, etc. And when I have something lemon, I want it to be REALLY lemony. I don't like wimpy lemon stuff. So whenever I bake something lemon, I usually double or triple the lemon juice or zest from what the recipe says. It's also handy that I have a lemon tree out back, although it is the lemon tree from hell with 3-inch thorns, stiff razor-sharp thorns like needles tipped with acid, so that if you get stuck it will sting and burn so bad.
But I digress! Lemon bread! Yummmmm!
As much as I love lemon, I loathe traditional fruitcake. But I make this bread with candied lemon peel, so it is my spin on a fruitcake.

This recipe is from this cookbook, but I've made some modifications. (amped up the lemon! and omitted walnuts)
INGREDIENTS
1/2 cup butter, at room temp
1/2 cup sugar
2 eggs, at room temp, separated
grated rind of 2 lemons.
1/4 cup fresh squeezed lemon juice
1 1/2 cups cake flour
2 teaspoons baking powder
1/4 cup milk
1/8 teaspoon salt
1/2 cup candied lemon peel
Preheat oven to 350F
Grease a 9"x5" loaf pan, (I used 3 mini loaf pans to make small loaves for gifting)
Cream butter and sugar until light and fluffy.
Beat in the egg YOLKS only. (reserve whites for later)
Add lemon rind and lemon juice and mix them in, then set this bowl aside.
Sift the cake flour and baking powder together.
Fold flour into the butter mixture, alternating with the milk.
Fold in the candied lemon peel.
set aside.
In another bowl, beat egg whites and salt with electric mixer until stiff peaks form.
Fold the egg whites gently into the dough, just until mixed.
Pour the batter into the greased loaf pans and bake in a 350F oven until a cake tester inserted in the middle comes out clean.
baking time for a 9x5 loaf will be about 45-50 minutes.
Baking time for my 3 mini-loaves was about 35 minutes.
Let cool 5 minutes in pan, then remove from pan and let cool on a cooling rack.
Enjoy with tea, if you are a true lemon FREAK like me you can spread some lemon curd on a toasted slice for triple-lemon overload!!
now playing: Led Zeppelin- The Lemon Song
Every year for the past 15 years or so, I have made an assortment of cookies and goodies for the Holidays. Some years I have gone just crazy and made like 15 different kinds, spread out over the month. Whenever I make a batch of cookies I freeze half of it, so that on Christmas eve I can take out the frozen cookies and have a beautiful assorted platter to serve guests. You can also make lovely gift bags this way with one or two of each kind per person.
I like to choose an assortment of recipes each year that will make a pleasing diverse platter. For example, as much as I love chocolate, it's kind of boring to have 10 kinds of chocolate cookies on a plate. I like to make sure there are different colors, different shapes and different flavors in my assortment.
I keep lists of everything I have made each year, but this year I'm going to keep the list in blog form. I'll try to include photos and recipes for each batch.
I will be adding to this blog article with edits or comments when I have a new entry, rather than adding a new article for each thing. So keep checking back to this article every few days for the latest goodie!
I kicked off my holiday baking today with two old favorites:
Bright-Eyed Susans
and Glazed Pecans
For all of my recipes, unless otherwise specified:
flour means all-purpose white flour. I will specify cake flour or whole wheat flour if you need it.
sugar means granulated white sugar. I will specify brown or powdered sugar if you need it.
butter means real sweet cream unsalted butter, do not substitute margarine or butter-favored crisco! I will specify shortening if you need it. I NEVER use margarine for baking because it has too high of water content and the texture will be soggy instead of crisp.
egg means whole egg. I will specify white or yolk if you need to separate the egg.
Yes, some of these things are not the healthiest foods for you. But in my opinion when it comes to baking you have to use the real stuff. No fake fat, fake sugar, chemical polymers or mystery goo.
---------------------------------
Bright-Eyed Susans
I forget where I originally got this recipe but I think it was a Southern cookbook.
INGREDIENTS:
* 3/4 cup butter, softened
* 1/2 cup sugar
* 1 egg
* 1 teaspoon vanilla
* 1/4 teaspoon salt
* 1 3/4 cups flour
* about 24 chocolate non-pareils
Cream together butter and sugar until well mixed.
Add egg, vanilla and salt until blended.
Sift in the flour and mix until blended.
Wrap dough in plastic wrap and chill for 1 hour in refrigerator. (not freezer)
Shape cookie dough into 1-inch balls; place about 2 inches apart onto an ungreased baking sheet.*
Place a chocolate non-pareil on each cookie, flattening the cookie.
Bake at 400°(F) for 8 to 10 minutes. Bake until set but not brown.
Makes about 2 dozen cookies
*Tip: I always use parchament paper for baking cookies, whether the recipe calls for greased or ungreased cookie sheet. You never have to grease the pan when you use parchament paper and you don't have to wash it either!
option: you can use Chocolate Stars or even Hershey Kisses if you can't find non pareils.
---------------------------------
Glazed Nuts
I got this recipe about 7 or 8 years ago from a Victorian-themed Christmas magazine. I am not sure the recipe is historically accurate but candied nuts were very popular Christmas treats in Victorian times, and they are just as delicious now. You can use almost any kind of nuts, I like using pecans, almonds, or walnuts. This candy glaze is similar to peanut brittle, but the proportion is more nuts and less "brittle"
INGREDIENTS:
1 cup whole raw nuts
1/2 cup granulated sugar (*see note)
2 tablespoons butter
Combine nuts, sugar and butter in heavy skillet. I use a cast iron skillet. Do not use a teflon-coated pan. Some candy-makers believe that sugar melts better in a copper pot, but I've never cooked with copper pots!
Cook over medium heat, stirring constantly with wooden spoon, until nuts are toasted and sugar is golden brown and the consistency of a thick syrup. (about 15 minutes)Sugar should not be grainy.
If you want to test with a water glass, the syrup should be in the hard crack stage.
Remove from heat and stir in 1/2 teaspoon vanilla.
Spray a piece of aluminum foil with non-stick spray (like Pam).
Spread the nuts onto the foil in an even layer, and immediately sprinkle lightly with salt. (if you wait too long the salt won't stick)
BE CAREFUL AND USE OVEN MITTS, and wear long sleeves. This molten sugar syrup is HOT and sticky so if some gets on you it is like napalm. It will burn you and take some skin off with it when you peel it off.
Let the candy cool, then break into 2 or 3 nut clusters. This makes a great gift in pretty glass jam jars with their labels soaked off. I like to spray-paint the jar lids silver or gold so you can't see the jam logo.
* Use pure cane sugar only for this recipe. I used to think all sugar is the same and for most baked goods it is, but whenever I used cheaper store brand sugar for this recipe, it just wouldn't caramelize properly. I later read that most store brand sugar is beet sugar which doesn't caramelize as well as cane sugar. So you can use beet sugar for cookies and cakes but I recommend cane sugar for candy making.
Also I recommend not making these on a rainy or humid day. The weather can seem to interfere with caramelizing too. Crisp dry days are the best.
*If sugar crystalizes and won't get syrupy, add a few tablespoons of corn syrup or maple syrup to get it liquidized. DO NOT ADD WATER! (or any water-based liquid) It will vaporize instantly on hitting the hot syrup and can give you nasty steam burns.
*option: you can use raw sunflower seed kernels for this recipe, that comes out really yummy! But if you use them, do not add them until you've cooked the sugar to the syrupy stage. They are so small they will burn if you cook them 15 minutes. Just cook the syrup alone and then add seeds when the syrup is 3-4 minutes from being done.
*option: Substitute other flavorings for vanilla. I have used cinnamon oil and a drop of red food coloring to make delicious cinnamon glazed almonds. It's like the coating on candy apples! Oils based flavorings work best, while alcohol based favorings like vanilla extract will sizzle a bit when you first stir them in. Stir fast before it all evaporates.
Ok, that's it for now but I'll make more goodies tomorrow!
---------------------------------
Update Dec 3, 2007
Today's cookie is Cuban Wedding Cakes
otherwise known as Mexican Wedding Cookies or Russian Tea Cakes.
I have tried a couple different recipes for these and this one is my favorite.
INGREDIENTS
2 cups flour
1 cup hazelnut meal *
1/2 cup powdered sugar
pinch of salt
1 teaspoon vanilla
1 cup butter, softened and cut into pieces
extra powdered sugar for coating
preheat oven to 325 (F)
Mix together the first 4 ingredients.
Stir in the vanilla.
With a pastry blender, cut in the butter.
Mix until dough looks line fine crumbs and holds together. All dry ingredients should be incorporated.
Knead dough with your hands a few times gently. Just squish it together to make sure all the dry stuff is mixed in.
Roll dough into 1-inch balls, and bake on ungreased cookie sheet at 325 (F) for 25 minutes. The lower temperature and slower baking time keeps the balls in their shape, so they don't spread out.
Cool 5 minutes, then roll cookies in powdered sugar. I use Snow White Non-melting Sugar because it won't dissolve or go invisible on a moist or oily cookie.
If you use regular powdered sugar and it does soak up the oil and melt, cool cookies completely and roll them in powdered sugar a second time.
* Nut meal is very finely chopped nuts. You may use hazelnut meal, almond meal, or pecan meal. You can also make your own by putting toasted unsalted nuts in a blender but be careful not to make nut butter.
---------------------------------
update Dec 6, 2007
Today's cookie of the day, which I actually baked yesterday but decorated today, is:
Christmas Spice Cookies
I made these in polar bear shapes in honor of Cute Knut's birthday, about which I will make a separate blog post. This recipe is so nostalgic for me. My mom used to bake these cookies every Christmas, and my sisters and I would decorate them. Now, my mom was not a June Cleaver cookie-baking mom! She has a PhD and worked full time her whole life. Christmas was the only time of year she baked cookies from scratch, and as my sisters and I got old enough, we took over the baking. But I have very fond memories of all of us sitting around the table with colored icings, colored sugars, jimmies, and those little silver balls that break your teeth if you eat them. I also still have the cookie cutters my mom used all those years ago, but I have increased the collection quite a bit.
Most people make simple sugar cookies to decorate, but I think this spice cookie recipe makes a much more interesting cookie.
INGREDIENTS
1/2 cup shortening, I use Crisco sticks because it's so easy to measure
1/2 cup sugar
1 egg
....
1 1/4 cup flour
1 1/2 teaspoons baking powder (not soda)
1/4 teaspoon salt
1/2 teaspoon ground cinnamon
1/4 teaspoon ground nutmeg
1/8 teaspoon ground cloves
Cream together shortening and sugar until well mixed and fluffy.
mix in egg.
sift together all the dry ingredients, then add to shortening mixture.
mix until all dry ingredients are incorporated and dough holds together
wrap dough in waxed paper and chill at least 30 minutes.
Flour a smooth surface and flour your rolling pin. I use a rolling pin cover which is like a thin knitted sock, and a rolling cloth which is like thick cotton canvas. They make rolling a little easier but you don't need them, you just may have to use a little more flour.
Divide the dough in half and roll out half at a time, until it's about 1/8 inch thick.
Cut out shapes with your favorite cookie cutters. I recommend polar bears!
Bake on a greased cookie sheet in a preheated 350 (F) oven for 10 minutes.
Cookies should be lightly brown at edges but not too dark.
cool completely before decorating.
To decorate:
I make a simple icing with powdered sugar and milk. I don't measure, just pour a cup or two of powdered sugar in a bowl and add milk a tiny bit at a time, stirring after each addition. Don't add too much milk to begin with! You can always add a few more drops to thin the icing but if you make it too runny, it takes a LOT of sugar to thicken it. You want it thin enough to spread but thick enough that it won't run off the sides of the cookie. You can divide he icing into smaller bowls now, and color them different colors with a drop or two of food coloring. I usually need a bowl of green for the tree cookies, a bowl of white for the snowflakes and polar bears, and some red for the stockings and ornaments.
Spread the icing on a few cookies at a time and then decorate with your choice of sprinkles, jimmies, colored sugars, edible glitter like I used on the bears, or fancy sugar decors.
But if you're in California like me, the days of little silver balls are over. apparently someone thinks those little silver balls will kill you. Go figure! I am still alive!
Check it out, I can't even buy them online.
Please note* Dragees have been banned in the state of California and it is illegal for us to ship them there. If you place an order to be shipped to California, the dragees will be omitted from your order and you will not be charged for the dragees.
The decors and sprinkles stick best when the icing is wet so just decorate a few cookies at a time. If you are really patient and fancy yourself the next Martha Stewart, you can use a cake decorating bag and really get fancy!
Have fun and if you have kids, let them help decorate the cookies. Make some sweet memories!
-------------------------
December 9 update!
Today's cookie is Peppermint Meltaways
I first made these cookies in 3rd grade, I think, with my dad. Our school was having some kind of bake sale and there was a cookie cookbook in the school library that I loved because of the gorgeous photos. I checked the book out and picked a cookie for us to make together. We made these mint meltaways, but in pale green instead of pink.
They were quite delicious and I remembered their melt-in-your-mouth quality. Then I returned the book to the library and that was that.
When I got older and started baking on my own, I looked for that cookbook in several libraries and could never find it. I remembered some of the photos so vividly from childhood but I didn't remember the name and I thought I'd never see them again. Then I was in a bookstore 2 years ago and I saw the cookbook! It was an updated version but I recognized it instantly. I almost bought it, but then had the idea to look for the original version used on Ebay, now that I knew the title. And HALLELUJAH, I found it! So now I try to bake something every year from this vintage 1973 cookbook and I still love looking at the photos I used to love so much as a child.
These mint meltaways are from page 113 of "The Betty Crocker Cooky Book".
INGREDIENTS
1 cup butter, softened
1/2 cup sifted powdered sugar
1 teaspoon peppermint extract
2 drops red food coloring
2 1/4 cups cake flour*
1/4 teaspoon salt
Preheat oven to 400F.
Cream butter, sugar, peppermint extract and food coloring thoroughly.
Measure flour and salt into a bowl, blend into butter mixture.
Drop by teaspoonfuls onto ungreased cookie sheet.
Bake for 8 minutes at 400 (F). Cookies should be set but not brown.
While warm, sift a light dusting of powdered sugar over cookies.
* cake flour is important to this recipe. Cake flour has less gluten than all-purpose flour so it makes a tender, melt-in-your-mouth cookie.
------------------------------
Update December 12, 2007
Today's goodie is Lemon Bread, it's a quickbread (non-yeasted), but it has a light, tender texture like a cake, thank to the cake flour and beaten egg whites.
I LUUUURVE me some lemons. I love lemon anything- cookies, cake, candy, drinks, etc. And when I have something lemon, I want it to be REALLY lemony. I don't like wimpy lemon stuff. So whenever I bake something lemon, I usually double or triple the lemon juice or zest from what the recipe says. It's also handy that I have a lemon tree out back, although it is the lemon tree from hell with 3-inch thorns, stiff razor-sharp thorns like needles tipped with acid, so that if you get stuck it will sting and burn so bad.
But I digress! Lemon bread! Yummmmm!
As much as I love lemon, I loathe traditional fruitcake. But I make this bread with candied lemon peel, so it is my spin on a fruitcake.
This recipe is from this cookbook, but I've made some modifications. (amped up the lemon! and omitted walnuts)
INGREDIENTS
1/2 cup butter, at room temp
1/2 cup sugar
2 eggs, at room temp, separated
grated rind of 2 lemons.
1/4 cup fresh squeezed lemon juice
1 1/2 cups cake flour
2 teaspoons baking powder
1/4 cup milk
1/8 teaspoon salt
1/2 cup candied lemon peel
Preheat oven to 350F
Grease a 9"x5" loaf pan, (I used 3 mini loaf pans to make small loaves for gifting)
Cream butter and sugar until light and fluffy.
Beat in the egg YOLKS only. (reserve whites for later)
Add lemon rind and lemon juice and mix them in, then set this bowl aside.
Sift the cake flour and baking powder together.
Fold flour into the butter mixture, alternating with the milk.
Fold in the candied lemon peel.
set aside.
In another bowl, beat egg whites and salt with electric mixer until stiff peaks form.
Fold the egg whites gently into the dough, just until mixed.
Pour the batter into the greased loaf pans and bake in a 350F oven until a cake tester inserted in the middle comes out clean.
baking time for a 9x5 loaf will be about 45-50 minutes.
Baking time for my 3 mini-loaves was about 35 minutes.
Let cool 5 minutes in pan, then remove from pan and let cool on a cooling rack.
Enjoy with tea, if you are a true lemon FREAK like me you can spread some lemon curd on a toasted slice for triple-lemon overload!!
now playing: Led Zeppelin- The Lemon Song
Wednesday, November 7, 2007
Shout Outs!
Time to give some shout outs to some amazing, cool, talented and GENEROUS Etsy members who have contributed to my plastic fusing mania by sending me some great plastic bags.
First there was my trip to England in July. I brought back some great orange plastic bags from Sainsbury's, a supermarket chain in the UK. But I used them up so fast! I was sad. My boring U.S. supermarket uses boring white bags. But I knew the Etsy community could make me happy! I posted a plea to UK Etsians to collect and save their Sainsbury's bags for me. Two smashing Brits came through for me, yay!
Thank you to http://magpienest.etsy.com and http://duckduckGoosestuff.etsy.com for all the gorgeous orange plastic!

They actually sent much more than this, but I used some of the bags already.

custom trick or treat bags, front and back are fused plastic and
sides are black cotton with silver reflective safety stripe

Then came Halloween, my favorite holiday of the year. And Halloween candy comes in the coolest plastic bags. All these great bags were sent to me by http://funkyquail.etsy.com and http://luna2005.etsy.com.

I have already fused some of the donated bags into projects

(that's a Sainsbury's bag as the background)

And last but DEFINITELY not least, is the amazing huge bundle of uber-cool Japanese plastic bags, sent to me by the extremely generous http://pipi.etsy.com. I just received them this week. I can't wait to start fusing these!

There's gotta be at least 50 bags in here.
Here is just a small sampling of the amazing Japanese plastic bags, with incredible cute and colorful graphics!

SQUEEE!!!
Thank you to all of these sellers for sending me such beautiful bags.
To learn how to fuse plastic bags yourself, check out my tutorial in this blog.
To purchase some of my fused plastic creations, visit my Etsy store. And be sure to check back in my store frequently to see some of the great bags above transformed into cute and funky accessories!
First there was my trip to England in July. I brought back some great orange plastic bags from Sainsbury's, a supermarket chain in the UK. But I used them up so fast! I was sad. My boring U.S. supermarket uses boring white bags. But I knew the Etsy community could make me happy! I posted a plea to UK Etsians to collect and save their Sainsbury's bags for me. Two smashing Brits came through for me, yay!
Thank you to http://magpienest.etsy.com and http://duckduckGoosestuff.etsy.com for all the gorgeous orange plastic!
They actually sent much more than this, but I used some of the bags already.
custom trick or treat bags, front and back are fused plastic and
sides are black cotton with silver reflective safety stripe
Then came Halloween, my favorite holiday of the year. And Halloween candy comes in the coolest plastic bags. All these great bags were sent to me by http://funkyquail.etsy.com and http://luna2005.etsy.com.
I have already fused some of the donated bags into projects
(that's a Sainsbury's bag as the background)
And last but DEFINITELY not least, is the amazing huge bundle of uber-cool Japanese plastic bags, sent to me by the extremely generous http://pipi.etsy.com. I just received them this week. I can't wait to start fusing these!
There's gotta be at least 50 bags in here.
Here is just a small sampling of the amazing Japanese plastic bags, with incredible cute and colorful graphics!
SQUEEE!!!
Thank you to all of these sellers for sending me such beautiful bags.
To learn how to fuse plastic bags yourself, check out my tutorial in this blog.
To purchase some of my fused plastic creations, visit my Etsy store. And be sure to check back in my store frequently to see some of the great bags above transformed into cute and funky accessories!
Saturday, October 20, 2007
Getting in the Halloween spirit
A little poetry to get you in the spooky mood of my most favorite holiday!
(My apologies for poetic license, but "five" didn't rhyme!)
Once upon a forum dreary, while I pondered weak and weary,
Over many a quaint and curious thread of forgotten gore,
While I nodded, nearly napping, suddenly there came a tapping,
As of some one gently rapping, rapping at my convo door.
'Tis some buyer,' I muttered, 'tapping at my convo door -
Only this, and nothing more.'
Ah, distinctly I remember it was in the bleak September,
And each separate dying ember wrought its ghost upon the floor.
Eagerly I wished the morrow; - vainly I had sought to borrow
From my crafts surcease of sorrow - sorrow for the lost Etsy four -
For the rare and snarky maidens whom the angels named Etsy four -
Nameless here for evermore.
Then this ebony bird beguiling my sad fancy into smiling,
By the grave and stern decorum of the countenance it wore,
'Though thy crest be shorn and shaven, thou,' I said, `'art sure no craven.
Ghastly grim and ancient raven wandering from the nightly shore -
Tell me what thy lordly name is on the Night's Plutonian shore!'
Quoth the raven, 'Etsy four.'
And the raven, never flitting, still is sitting, still is sitting
On the pallid bust of Rokali just above my chamber door;
And his eyes have all the seeming of a demon's that is dreaming,
And the lamp-light o'er him streaming throws his shadow on the floor;
And my soul from out that shadow that lies floating on the floor
Shall be lifted - nevermore!
Monday, September 24, 2007
Fused Plastic bags tutorial
This is copied from a blog I wrote on myspace on May 7, 2007.
I was all set to write a plastic fusing tutorial because lots of people were asking me for one, but then Etsylabs published a tutorial on May 6! LOL
So I wrote mine anyway, but more as a complement or addition to theirs.
My own tips and tricks I will add to the above:
I was all set to write a plastic fusing tutorial because lots of people were asking me for one, but then Etsylabs published a tutorial on May 6! LOL
So I wrote mine anyway, but more as a complement or addition to theirs.
Here are some good tutorials for fusing plastic bags:
http://etsylabs.blogspot.com/2007/05/long-overdue-fusing-plastic-bag.html
http://blog.etsy.com/?p=239
http://modcottage.com/?p=109
http://www.inthewake.org/howtos/shopping-bag-plastic.html
My own tips and tricks I will add to the above:
This is all you need to start fusing:
1. an iron
2. a hard heat-resistant surface like a wooden cutting board
3. baking parchment paper. This works better than typing paper because it's silicon coated and nothing sticks to it. It's also larger, and semi-transparent so you can see appliqués have the correct placement, etc.
4. Some plastic bags! There's no shortage of those in the world, unfortunately.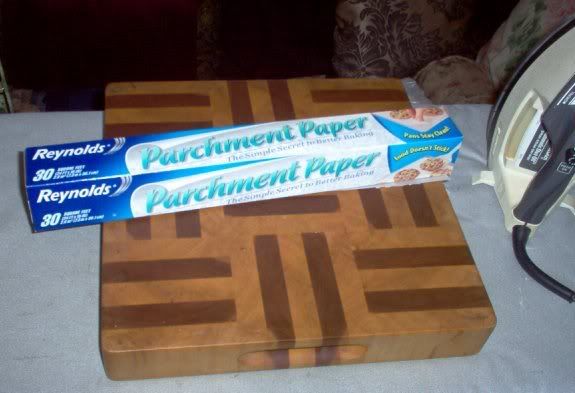
DO set the iron between polyester and rayon. One of the tutes says to set it at cotton, that is too hot in my opinion but perhaps irons vary.
DON'T use steam.
DO fuse both HDPE (recycle code 2) and LDPE (recycle code 4) bags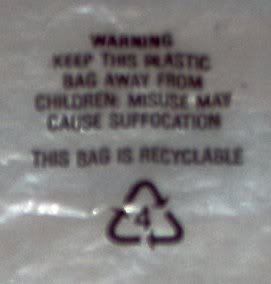
HDPE is the crinkly plastic grocery bags, LDPE is the glossy stretchy bags like Target bags, also clear bags like dry cleaner bags.
They will both fuse, to themselves and to eachother. You may need to lower the heat just a bit for LDPE.
There are some tutorials which say you cannot use LDPE, but I have successfully fused it.
The sides of this bag are Target bags (LDPE) and the inside layers are HDPE
and this entire bag is LDPE, I used the clear bags my newspaper is delivered in on rainy days
DO use all kinds of plastic, not just grocery bags. Use the bags from frozen veggies, use the bag from dried pasta, bread wrappers, etc. You can use potato chip bags inside out to get a silver metallic color. This works better for small appliqués than for a large piece, because foil-lined plastic will not shrink at the same rate as normal plastic, so if you try to fuse large areas of foil lined plastic you will get bubbles and puckers..
DO apply the heat a little longer for thicker plastic. You also don't need to use as many layers when you use a thicker plastic.
DO put a clear plastic layer over any vivid colored design you want to show on the outside of the bag. Red ink especially seems to melt and bleed. If you don't use the clear layer on top, the ink will transfer to your paper like this
DO use a layer of clear plastic on top of appliqués too, to seal them in.
DO reuse the parchament paper over and over, unless it gets an ink transfer from a bag. Then you will need a clean piece, because it will transfer that ink back to your next fused piece.
DON'T use waxed paper instead of parchament paper! The wax will melt and make a stinky mess. Waxed paper cannot take the heat, freezer paper is also not ideal because it's made for use with cold not with heat. Baking parchament paper is the best because it's made to withstand heat up to 420 degrees Fahrenheit.
DO use a hard ironing surface such as a wooden cutting board. A hard, smooth surface will help you get even adhesion.
DO use firm pressure when ironing, but keep the iron moving. This isn't like fusible interfacing where you have to keep the iron in place for 10 or 15 seconds- f you do that the plastic will probably burn.
DO fuse one or two new layers at a time.
DON'T try to fuse all 8 layers at once, or the middle layers will have incomplete adhesion.
If you find your fused plastic curling up too much, flip it over and fuse the next layer onto the back. This will equalize the shrinkage and flatten it out.
DO sew the finished material in the sewing machine or serger.
DO use a longer stitch length, so you won't have too many holes forming a perforated line.(prone to tearing)
DO sew small items wrong sides together.
You DON'T need to turn the seams to the inside like you do with fabric items, because the plastic does not fray. Also, it may be difficult to turn smaller items like cosmetic pouches inside out.
To see some of my fused plastic finished projects, check out this Flickr set.
To see my fused plastic items for sale, check out my Etsy store. (more items coming soon)
Sunday, May 13, 2007
Custom fabric tutorial- bleach stencilling
With the recent custom fabric tutorials and workshops on etsy,
http://blog.etsy.com/?p=272
http://blog.etsy.com/?p=284
I thought I'd write a tutorial on a bleach stencilling method I learned in 1989 in a Theater Fabric Modification seminar at San Francisco State University. (when I was majoring in costume design at the time)
There are some very good tutorials already on the web for the bleach stencil method:
here
here
and here
Those are good resources and you should read them for general tips.
All of the above are using the familiar type of pictorial stencils. The method I will share is using lace or a doily as your stencil, to make a patterned design fabric rather than a pictorial design. This was used in the costume shop to simulate brocade. Theatrical costumes are seen from a distance, not in closeups like film, so there is a long tradition of making cheap fabrics look like expensive ones, and it only has to pass from a distance. But the technique is a cool one for adapting to craft usage.
Before you get started, some Do's and Don't's:
DO wear old clothes that you won't mind if they get bleached
DO wear safety glasses- the bleach mist might go in your eye, and as they said in Ghostbusters: "that would be bad".
DO this process in the shower or the garage, or outdoors.
DON'T do it in any room with carpet, upholstery, curtains, etc.
DO use basic cheap chlorine bleach
DON'T use color-safe bleach
DO test a small piece of your fabric with some bleach solution before you start, so you will know what color you will get when it lightens.
DO use about 3 parts bleach to one part water.
DO use a good spray bottle that gives an even, fine mist with no drips and blobs.
DO use a dark colored fabric which is 100% cotton or at least a 50% cotton/50% poly blend. It doesn't have to be only T-shirts, you can do this technique on corduroy, denim, cotton velveteen, etc.
Here are the materials I am working with

I have a piece of black percale sheet, a poly-cotton blend, and a piece of heavy thick cotton lace to use as my stencil. This was a recycled thrift shop blouse.
You should choose a piece of lace which is thick, like a doily. Thin laces will just soak through. If you can find a vintage 1960's plastic lace tablecloth or placemat, those are ideal. Other thrift store finds like crocheted shawls can be used too- anything with an openwork pattern that is thick enough.
1. Lay the lace on top of your dry fabric, with a safe surface underneath. I'm using my washing machine lid, you can also use a large piece of tinfoil, or just do this process in the shower.
2. Spray an even mist of bleach onto the fabric. Don't saturate the lace, you just want a light mist.
3. Immediately remove the lace and set it aside or hang it up to dry.
This is the fabric immediately after the lace has been removed- the bleach has just begun to remove some of the dye.

4. let the dark fabric set a few minutes as the bleach continues to lighten it.
5. When the desired color is reached, quickly rinse the fabric in a bucket of water. Do not let it sit in the water. The bleach will be rinsed into the water and if you let it sit, the whole item will bleach evenly and lose the pattern.
6. Empty out the bucket and repeat a few times with clean water. Do quick rinses, swish the fabric around a few times and then change the water.
7. Now run the fabric through the dryer. This is my final result after it's dry:

8. you can also rinse and dry your lace to reuse it later. If your lace piece is small, you can do several areas at a time, one after another to make a repeating pattern. However, feel the lace periodically to make sure it's not getting saturated.
Another way to use bleach in making your own custom fabrics is the great Clorox Bleach Gel Pen.

For my example I am just drawing some simple spiral designs on my black sheet.

Let the gel sit for 1-3 minutes until the desired color is reached.
Then do the rinsing process from steps 5 and 6 above.
Then run it through the dryer.
Here is my final result:

These are just some quick samples of what can be done with household bleach. There's always an element of unpredictability and imperfection with this method, but I like that and it looks more earthy and handmade, like batik or mudcloth. It's not always possible to bleach a dark fabric into a pure white design. That much bleach would possible eat holes in the fabric. You are more likely to acheive a lighter shade of your starting color. For example here bleaching black fabric, I get a greyish brown. If you were bleaching a forest green cotton, you might end up with a light greenish yellow. So always experiment with a small piece first and don't use this method on very expensive fabrics. I find that when I use cheap materials, my creativity is liberated because I'm not afraid of ruining them! Most of all, have fun and be safe.
http://blog.etsy.com/?p=272
http://blog.etsy.com/?p=284
I thought I'd write a tutorial on a bleach stencilling method I learned in 1989 in a Theater Fabric Modification seminar at San Francisco State University. (when I was majoring in costume design at the time)
There are some very good tutorials already on the web for the bleach stencil method:
here
here
and here
Those are good resources and you should read them for general tips.
All of the above are using the familiar type of pictorial stencils. The method I will share is using lace or a doily as your stencil, to make a patterned design fabric rather than a pictorial design. This was used in the costume shop to simulate brocade. Theatrical costumes are seen from a distance, not in closeups like film, so there is a long tradition of making cheap fabrics look like expensive ones, and it only has to pass from a distance. But the technique is a cool one for adapting to craft usage.
Before you get started, some Do's and Don't's:
DO wear old clothes that you won't mind if they get bleached
DO wear safety glasses- the bleach mist might go in your eye, and as they said in Ghostbusters: "that would be bad".
DO this process in the shower or the garage, or outdoors.
DON'T do it in any room with carpet, upholstery, curtains, etc.
DO use basic cheap chlorine bleach
DON'T use color-safe bleach
DO test a small piece of your fabric with some bleach solution before you start, so you will know what color you will get when it lightens.
DO use about 3 parts bleach to one part water.
DO use a good spray bottle that gives an even, fine mist with no drips and blobs.
DO use a dark colored fabric which is 100% cotton or at least a 50% cotton/50% poly blend. It doesn't have to be only T-shirts, you can do this technique on corduroy, denim, cotton velveteen, etc.
Here are the materials I am working with
I have a piece of black percale sheet, a poly-cotton blend, and a piece of heavy thick cotton lace to use as my stencil. This was a recycled thrift shop blouse.
You should choose a piece of lace which is thick, like a doily. Thin laces will just soak through. If you can find a vintage 1960's plastic lace tablecloth or placemat, those are ideal. Other thrift store finds like crocheted shawls can be used too- anything with an openwork pattern that is thick enough.
1. Lay the lace on top of your dry fabric, with a safe surface underneath. I'm using my washing machine lid, you can also use a large piece of tinfoil, or just do this process in the shower.
2. Spray an even mist of bleach onto the fabric. Don't saturate the lace, you just want a light mist.
3. Immediately remove the lace and set it aside or hang it up to dry.
This is the fabric immediately after the lace has been removed- the bleach has just begun to remove some of the dye.
4. let the dark fabric set a few minutes as the bleach continues to lighten it.
5. When the desired color is reached, quickly rinse the fabric in a bucket of water. Do not let it sit in the water. The bleach will be rinsed into the water and if you let it sit, the whole item will bleach evenly and lose the pattern.
6. Empty out the bucket and repeat a few times with clean water. Do quick rinses, swish the fabric around a few times and then change the water.
7. Now run the fabric through the dryer. This is my final result after it's dry:
8. you can also rinse and dry your lace to reuse it later. If your lace piece is small, you can do several areas at a time, one after another to make a repeating pattern. However, feel the lace periodically to make sure it's not getting saturated.
Another way to use bleach in making your own custom fabrics is the great Clorox Bleach Gel Pen.
For my example I am just drawing some simple spiral designs on my black sheet.
Let the gel sit for 1-3 minutes until the desired color is reached.
Then do the rinsing process from steps 5 and 6 above.
Then run it through the dryer.
Here is my final result:
These are just some quick samples of what can be done with household bleach. There's always an element of unpredictability and imperfection with this method, but I like that and it looks more earthy and handmade, like batik or mudcloth. It's not always possible to bleach a dark fabric into a pure white design. That much bleach would possible eat holes in the fabric. You are more likely to acheive a lighter shade of your starting color. For example here bleaching black fabric, I get a greyish brown. If you were bleaching a forest green cotton, you might end up with a light greenish yellow. So always experiment with a small piece first and don't use this method on very expensive fabrics. I find that when I use cheap materials, my creativity is liberated because I'm not afraid of ruining them! Most of all, have fun and be safe.
Saturday, May 12, 2007
Ugly is the new black!
Submitted for your disapproval, the treasury of ugliness.
This is a collection of items nominated by their creators for the Ugliest Item on Etsy contest, which was the brainchild of Quirke.
The top row contains the first, second and third prize winners, determined by popular votes.
Now before you say what a meanie I am to call these things ugly, please understand this treasury was curated with love. All of the items in it were nominated by their own makers for the contest, with plenty of humor and affirmation by the etsy community. Many of the self-nominated items were actually sold during the contest, so the contest was also a good marketing gimmick. It really proves that ugliness is in the eye of the beholder. If these ugly things can find homes, it gives hope to all of us, that someone may find us beautiful.
Ironically, the jewelry artisan BOXC nominated this necklace, which I absolutely LOVE and have had it in my favorites since March 30! I even included it in a treasury earlier this week, which was completely sincere things I loved, with no irony or joke involved. Here's a screenshot of that trteasury.

I even nominated one of my own creations for Teh Ugly contest, but it was ineligible because it wasn't for sale in my store. (I know my dear readers will be heartbroken that they cannot purchase it!)

This little treasure was made as a gift for my friend Wendy. Here is the inside.
So, in celebration of ugly ducklings everywhere , and above all our ability to laugh at ourselves, I salute the winners!
This is a collection of items nominated by their creators for the Ugliest Item on Etsy contest, which was the brainchild of Quirke.
The top row contains the first, second and third prize winners, determined by popular votes.
Now before you say what a meanie I am to call these things ugly, please understand this treasury was curated with love. All of the items in it were nominated by their own makers for the contest, with plenty of humor and affirmation by the etsy community. Many of the self-nominated items were actually sold during the contest, so the contest was also a good marketing gimmick. It really proves that ugliness is in the eye of the beholder. If these ugly things can find homes, it gives hope to all of us, that someone may find us beautiful.
Ironically, the jewelry artisan BOXC nominated this necklace, which I absolutely LOVE and have had it in my favorites since March 30! I even included it in a treasury earlier this week, which was completely sincere things I loved, with no irony or joke involved. Here's a screenshot of that trteasury.
I even nominated one of my own creations for Teh Ugly contest, but it was ineligible because it wasn't for sale in my store. (I know my dear readers will be heartbroken that they cannot purchase it!)
This little treasure was made as a gift for my friend Wendy. Here is the inside.
So, in celebration of ugly ducklings everywhere , and above all our ability to laugh at ourselves, I salute the winners!
Yet another online toy
So now I have a blog. Welcome to it! Well I had two blogs already on myspace, (my private one and my craft one) which I rarely updated, but now I have this one. Yet another online toy for me to neglect! I am not a big blog reader and will probably not be the most entertaining blog writer. The medium gives me some performance anxiety to be honest, like I was back in college with an essay due. I actually prefer message boards for my online communication, they are more democratic and interactive, less ego-centric, and I'm far more entertaining in short spontaneous spurts than in long proofread articles. I guess I am in constant fear of being exposed as not as clever as people think I am. I am the poster child for wasted potential. But then again, most blogs I read leave me with the distinct impression that their authors are not nearly as clever as they think they are. They just forge ahead anyway, unencumbered by self-doubt or self-awareness.
This blog will be focused on the craft side of my life. Stuff I love, stuff I am making, and how you can make it too. You won't find any sexual TMI revelations, any political rants, any whiny-assed petty griping about the minutiae of daily life, or any thinly-veiled passive-aggressive bashing of my friends which they are expected to decipher. You won't find any posts with a superior attitude that I am so much wiser and more evolved than other folks. I won't try to impress you with lists of the books I'm reading, unless they relate to art or craft.
It's the lighter and fluffier eclipse, now with 20% less bitterness!
Welcome to my unBlog.
Subscribe to:
Posts (Atom)
